
The best way to add a countdown timer to your Shopify Store
When there’s a special event coming up and you want to increase the urgency (yes, induce that FOMO) felt by your customers to make them more likely to check out, there are few better choices than to add a countdown timer to your Shopify theme.
It’s a pretty common tactic, you’ve probably seen it yourself on many, many websites. From Amazon Daily Deals to Black Friday Sales, you’ll see limited time countdown offers all over the place.
This morning, I wanted to add a countdown timer to one of my Shopify stores but I didn’t want to add an app for it as I’m very much a DIY kinda gal, plus it’s been a hot minute since I’d written any vanilla JavaScript. Let’s get into it!
Please note that this code and instructions are provided without warranty. They worked as of this writing in September, 2024. If you have any troubles, please reach out to Shopify support.
The countdown timer code
The first thing to do is write the code, this is partly because writing it directly into your theme is not the greatest idea because it can break your theme if you encounter any errors, and thus mess up your theme in real time. The other reason is that most IDEs help you identify where the errors in your code are, so they provide useful feedback on how to debug and fix any errors.
This is the JavaScript and HTML code that we’ll be adding to our theme to create the countdown timer.
First we have the HTML framework where it will show on the page. Next, we style the content. Lastly we use JavaScript to get the time we’re counting down to, which is Halloween in this case, October 31st. Then we take the current time with TimeNow and take the difference between those dates to display the countdown.
<h2 class="countdown-timer-heading">Halloween is coming soon!</h2>
<div class="countdown-timer-container">
    <div class="countdown-timer-values" id="days">00</div>
    <div class="countdown-timer-values" id="hours">00</div>
    <div class="countdown-timer-values" id="minutes">00</div>
    <div class="countdown-timer-values" id="seconds">00</div>
    <div>Days</div>
    <div>Hours</div>
    <div>Minutes</div>
    <div>Seconds</div>
</div>

<style>
    .countdown-timer-heading {
        font-size: 2em;
        margin-bottom: 0;
        text-align: center;
    }

.countdown-timer-container {
    width: 90%;
    max-width: 600px;
    margin: 0 auto;
    display: flex;
    flex-direction: row;
    flex-wrap: wrap;
    margin-bottom: 48px;
}

.countdown-timer-container div {
    width: 25%;
    text-align: center;
    font-size: 30px;
}

.countdown-timer-values {
    font-size: 60px !important;
}
</style>

<script type="text/javascript">

    // Counting down to Halloween
    const halloweenDate = new Date("2024-10-31");
    const daysValue = document.querySelector("#days");
    const hoursValue = document.querySelector("#hours");
    const minutesValue = document.querySelector("#minutes");
    const secondsValue = document.querySelector("#seconds");


    // Run the function every second aka 1000 ms
    let x = setInterval(function () {
        let dateTimeNow = new Date().getTime();
        let difference = halloweenDate - dateTimeNow;

        // Calculating time and assigning values
        daysValue.innerHTML = Math.floor(difference / (1000 * 60 * 60 * 24));
        hoursValue.innerHTML = Math.floor((difference % (1000 * 60 * 60 * 24)) / (1000 * 60 * 60));
        minutesValue.innerHTML = Math.floor((difference % (1000 * 60 * 60)) / (1000 * 60));
        secondsValue.innerHTML = Math.floor((difference % (1000 * 60)) / 1000);

        if (difference < 0) {
            clearInterval(x);
        }
    }, 1000);

</script>
So far so good! If you want to change the date that you’re counting down to in your Shopify theme, you can edit this code to have a different date, and maybe not say Halloween. It can be used for any date you like, so it could be Black Friday or Xmas, Back to School or anything else that motivates your customers.
Adding the code to the Shopify Theme
Second, we’re going to go to your Shopify admin and then go to Online Store -> Themes. Then underneath the theme image is a button with an ellipsis ..., click on that and then on “Edit Code”. If you haven’t been here before, don’t be intimidated, but also don’t be careless because this is where your Shopify theme’s everything is.
On the left navigation panel, scroll down to snippets and then click on + add new snippet, it will take you to a code editing panel on the right. In my case, I called the snippet halloween_countdown` as it made sense, but call it anything you like that makes sense to you. Avoid using spaces in the filename by using hyphens (-) or underscores (_). Paste the code we wrote earlier into that panel and save it. Be careful not to add a lot of empty space at either the top or bottom of the file as it’s not recommended and can cause unexpected weirdness. Save your file when you’re done.
In my case, I wanted the countdown to be shown between the menu header and the CTA scroll images that I show above my products. So, in my case, I added the snippet to sections/image-banner.liquid at the very top, underneath the line that says {{ 'section-image-banner.css' | asset_url | stylesheet_tag }}.
The code to add to your preferred section’s liquid file is:
*{% include 'halloween_countdown',*
*%}*
Yes, that really is how you add it. Save your file and take a look at your handiwork, preferably in a new tab, just in case you need to go back and fix anything (isn’t programming glamourous?).
I know some people like liquid templating and others are not exactly fans. If you want to find out more about liquid, the liquid reference guide can be found here.
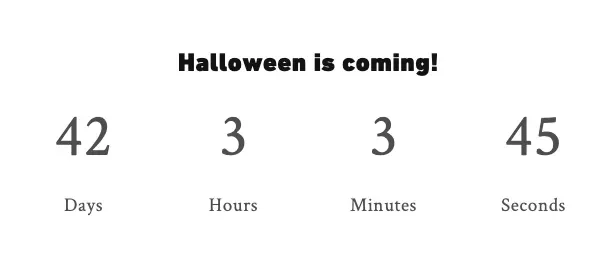
The Result
If all went well, you should see a shiny new countdown timer happily counting down to Halloween, or whatever date you set it to count to.
I hope you enjoyed this tutorial and maybe I’ll make more if it was useful.